In Windows 10, Microsoft Defender is built-in anti-virus software designed to protect your computer from viruses and malware. However, there are certain circumstances where you may need to turn it off, such as installing certain software or due to specific corporate policies. In addition to the usual operations, you can also control whether Defender is enabled or disabled through group policies and registries. This article details three ways to turn Microsoft Defender off or on. But the shutdown of the antivirus software is generally temporary, after a period of time, the system will automatically turn on the feature to protect the computer, and if you need to turn it off, you need to turn it off again.
1. Using Windows Security.
This is the most common and simplest method, suitable for general users. Steps are as follows:
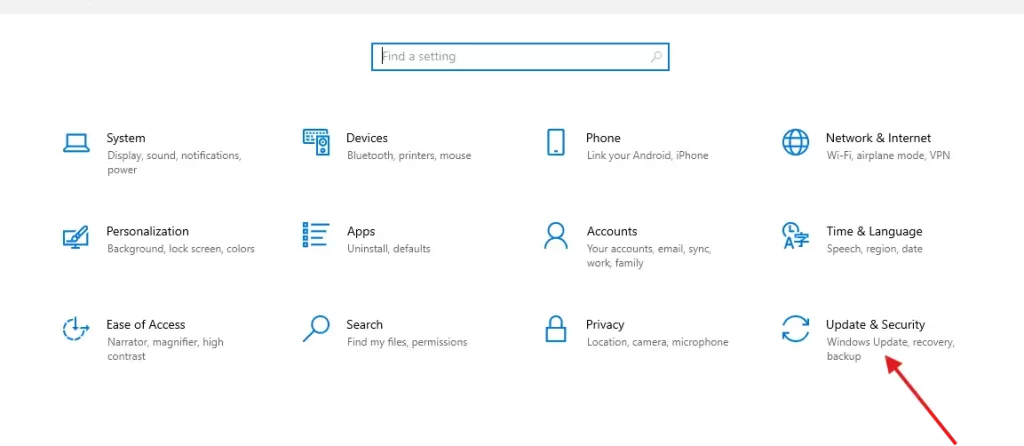
- Open “Settings” and click “Update & Security“.
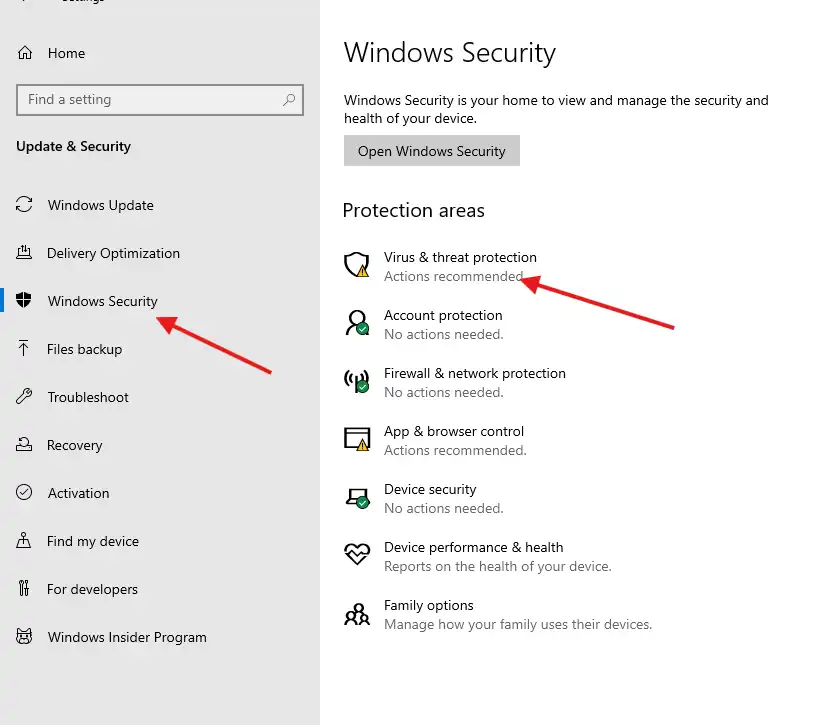
- Select “Windows Security” and click “Virus & threat protection“.
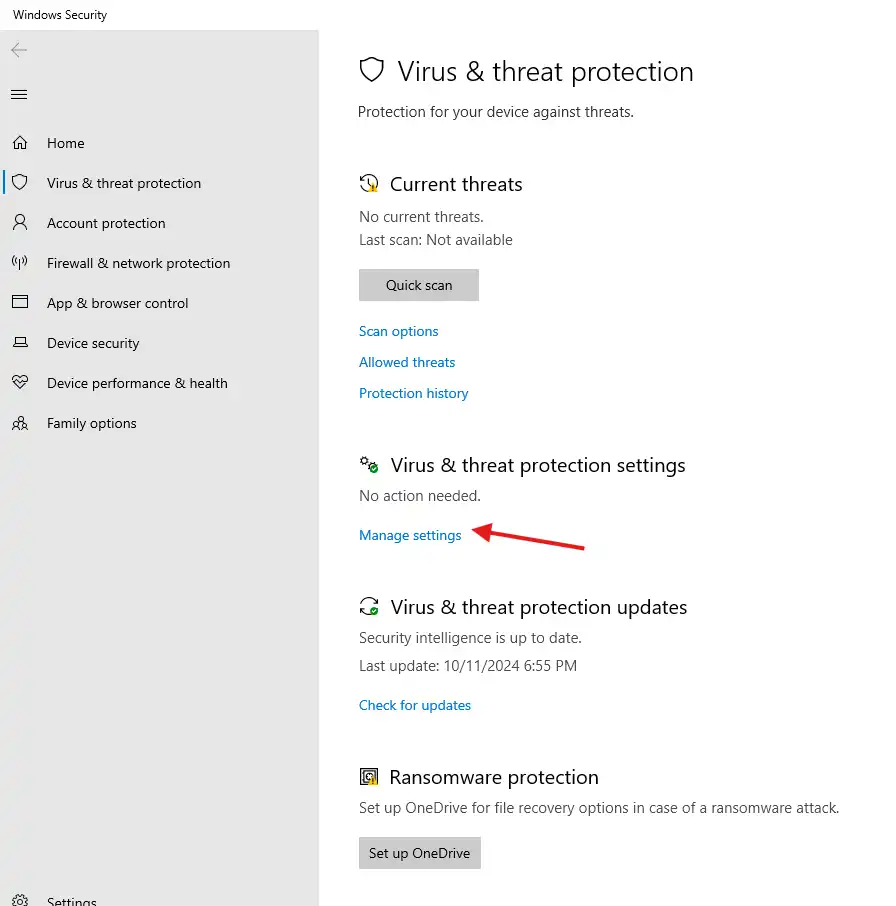
- Under “Virus & Threat Protection Settings” click “Manage settings“.
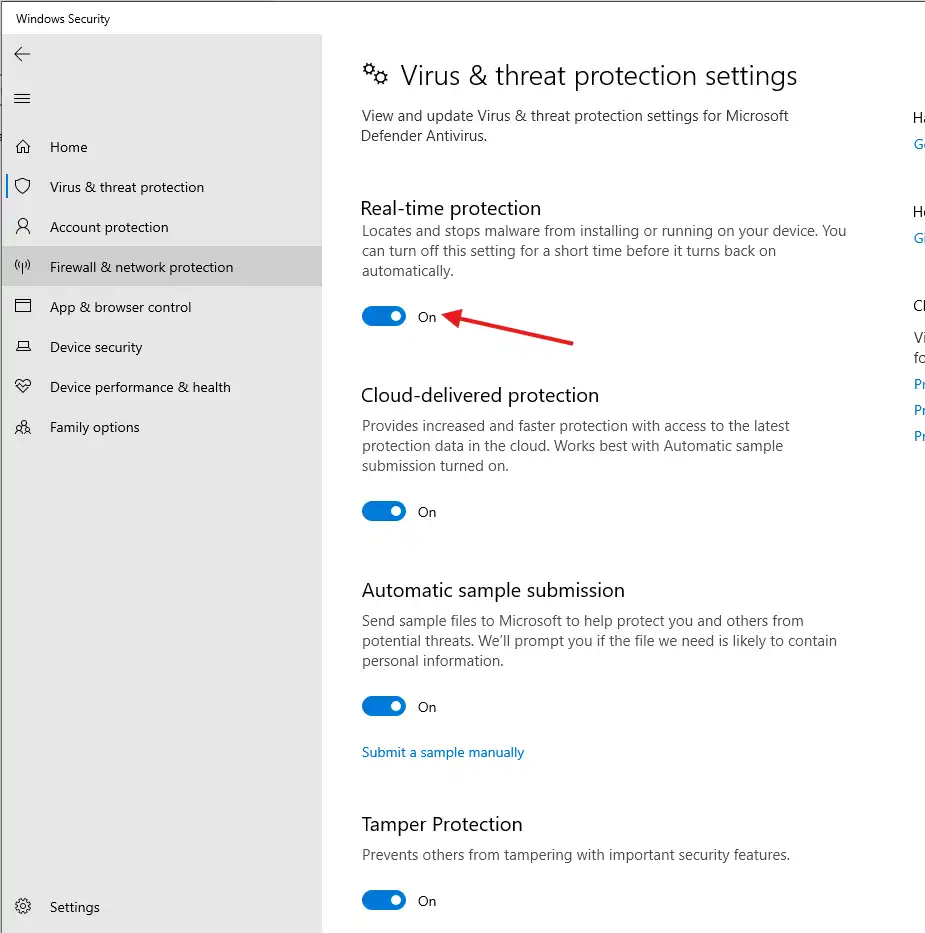
- Toggle off “Real-time protection“.
2. Using Group Policy Editor.
This method is suitable for users of Windows 10 Professional and Enterprise editions. The Group Policy Editor allows you to permanently disable Microsoft Defender without having to turn it off again after every restart. Steps are as follows:
- First, you need to log in as a Super Administrator otherwise, this operation may not be effective. While this is shown in Windows 10, you can refer to How To Activate and Switch to the Super Administrator Account in Windows 11—the process is essentially the same.
- Open the Group Policy Editor: Press `Win + R`, type `gpedit.msc`, and press Enter to open the Local Group Policy Editor.
- Navigate to antivirus settings: In the Group Policy Editor, expand the following path: `Computer Configuration > Administrative Templates > Windows Components > Microsoft Defender Antivirus`.
- Disable Defender: On the right side, find and double-click “Turn off Microsoft Defender Antivirus“. In the pop-up window, select “Enabled” and click “OK“. This will permanently disable Microsoft Defender until you manually re-enable it.
- To re-enable Defender: Repeat the above steps and select “Not Configured” or “Disabled“.
3. Using Registry Editor.
For Home edition users, the Group Policy Editor is unavailable, so you can achieve the same effect by modifying the registry. Modifying the registry carries some risks, so it’s recommended to back up the registry before making changes.
Recent Update: If you find that modifying the registry doesn’t work, refer to the following update. That means this method is deprecated in some Windows 10 version.
The `DisableAntiSpyware` option was originally designed for OEM manufacturers and IT professionals to disable Microsoft Defender Antivirus in order to use other antivirus products during deployment. However, because Microsoft Defender Antivirus automatically disables itself when other antivirus programs are detected, this setting has become an obsolete legacy option. Therefore, we decided to remove this registry entry. This change is included in Microsoft Defender Antivirus platform version 4.18.2007.8 and above, KB 4052623. Note that this setting is protected by the Tamper Protection feature, which is enabled by default in Windows 10 Home and Pro versions 1903 and later.

The removal of `DisableAntiSpyware` only affects versions of Windows 10 prior to version 1903 that use Microsoft Defender Antivirus. This change does not affect the connection between third-party antivirus software and Windows Security, and third-party antivirus software will continue to work as usual.

Update on August 31, 2020: Microsoft Defender Antivirus’s tamper protection feature is now enabled by default on all consumer devices running Windows 10. This feature is designed to prevent network attackers from disabling built-in security solutions like antivirus protection to access data, install malware, or abuse the device.

Since Microsoft Defender Antivirus automatically disables itself when other antivirus programs are detected, we decided to remove the old registry setting called `DisableAntiSpyware`. This setting was used by OEM manufacturers and IT administrators to disable Microsoft Defender Antivirus during deployment and is no longer applicable to consumer devices. It will be removed in Microsoft Defender Antivirus platform version 4.18.2007.8 and above (see KB 4052623 for details). Devices running Windows Enterprise E3 and E5 will receive this update in the future.
Steps:
- Open Registry Editor: Press `Win + R`, type `regedit`, and press Enter to open Registry Editor.
- Navigate to the relevant path: Expand `HKEY_LOCAL_MACHINE\SOFTWARE\Policies\Microsoft\Windows Defender`.
- Disable Defender: In the right pane, find or create a new `DWORD (32-bit)` value named `DisableAntiSpyware`. Double-click it, set the value data to `1`, and click “OK“. This will disable Microsoft Defender.
- To re-enable Defender: Change the value of `DisableAntiSpyware` to `0` or simply delete this entry.
4. Use Case Explanation.
4.1 System configuration in enterprise environment.
- In enterprises, administrators often need to disable Defender through Group Policy to standardize antivirus configurations and avoid conflicts with third-party security software.
- For example, a large company might install its own antivirus software, and using Group Policy to disable Defender can help IT staff turn it off in bulk, reducing manual operation time.
4.2 Customized protection needs.
- Home edition users can disable Defender via the registry, which is particularly useful when using software that requires the protection to be disabled.
- For example, some advanced system tools or development environments may require the protection to be completely turned off, and modifying the registry allows for deeper control over the system.
5. Important Notes.
- Be extra careful when modifying Group Policy and registry settings, as incorrect configurations may lead to system instability or other issues. It is recommended to create a system restore point or back up the registry before making any changes.
- Leaving Defender disabled for a long time may expose your system to risks, so it’s recommended to disable it only when necessary and re-enable it as soon as possible after completing the required operations.
- With the three methods introduced in this article, you can choose the most suitable way to enable or disable Microsoft Defender based on your needs, ensuring optimal system performance and security.
6. Demo Video.
You can watch the following demo video by choosing your preferred subtitle language.