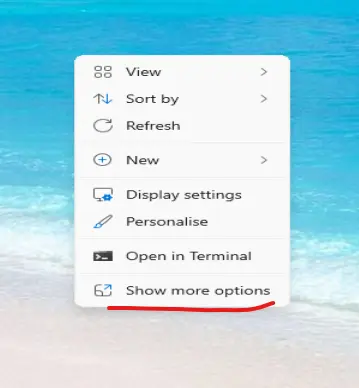
When using Windows 11, right-clicking on the desktop or a folder brings up a menu with “Show more options” whereas in Windows 10, this menu would appear directly. This article provides a step-by-step guide on how to modify the registry to make the right-click menu in Windows 11 behave like it did in Windows 10, displaying the full menu without an extra click. That means how to disable or enable the “Show more options” menu item in Windows 11.
1. Open the Registry Editor.
- Login to Windows 11 with the account Administrator, this is very important.
- Click the “Start” button.
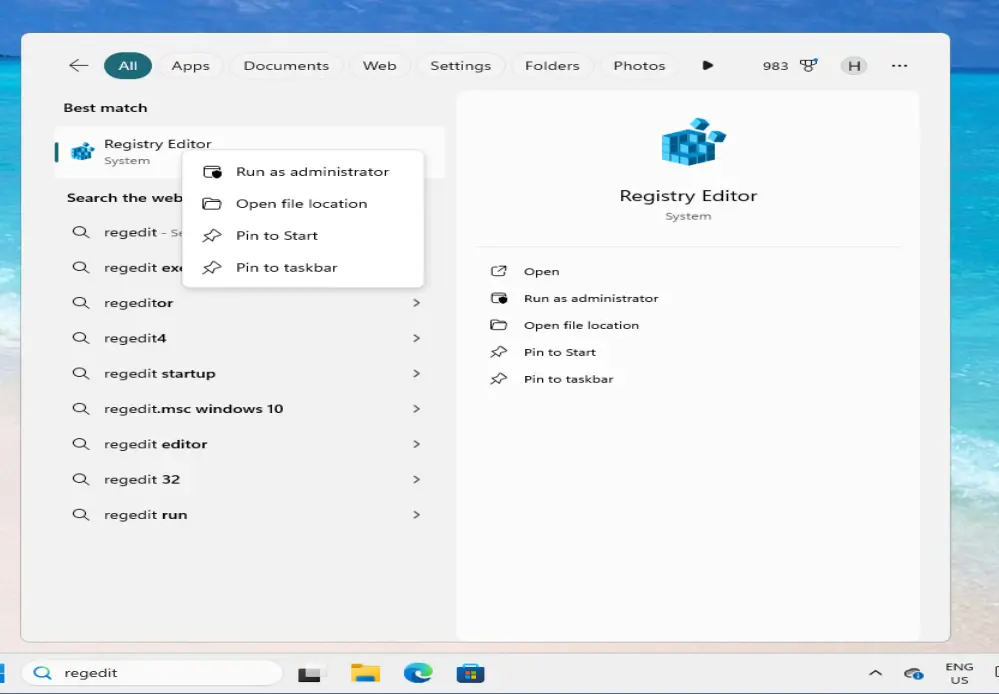
- Type “regedit” in the search box to find the “Registry Editor“.
- Right-click on “Registry Editor” and select “Run as administrator“.
2. Navigate to the Appropriate Registry Path.
- In the Registry Editor, expand the following path:
Computer\HKEY_LOCAL_MACHINE\SOFTWARE\Classes\CLSID\{86ca1aa0-34aa-4e8b-a509-50c905bae2a2}\InProcServer32 - Select the `InProcServer32` entry under this path.
3. Modify the Registry Item Permissions.
- Right-click on the `{86ca1aa0-` registry key and choose “Permissions…“.
- Click on the “Advanced” button, and note that the current owner is “TrustedInstaller“.
- Click “Change” to modify the owner to “Administrator.”

- Click “Auditing,” then “Add” to select the “Administrator” principal.
- Click “Check Names” and confirm, select the “Full Control” permission, and click “OK“.
- Check the box for “Replace owner on subcontainers and objects“, then click “Apply” and “OK“.
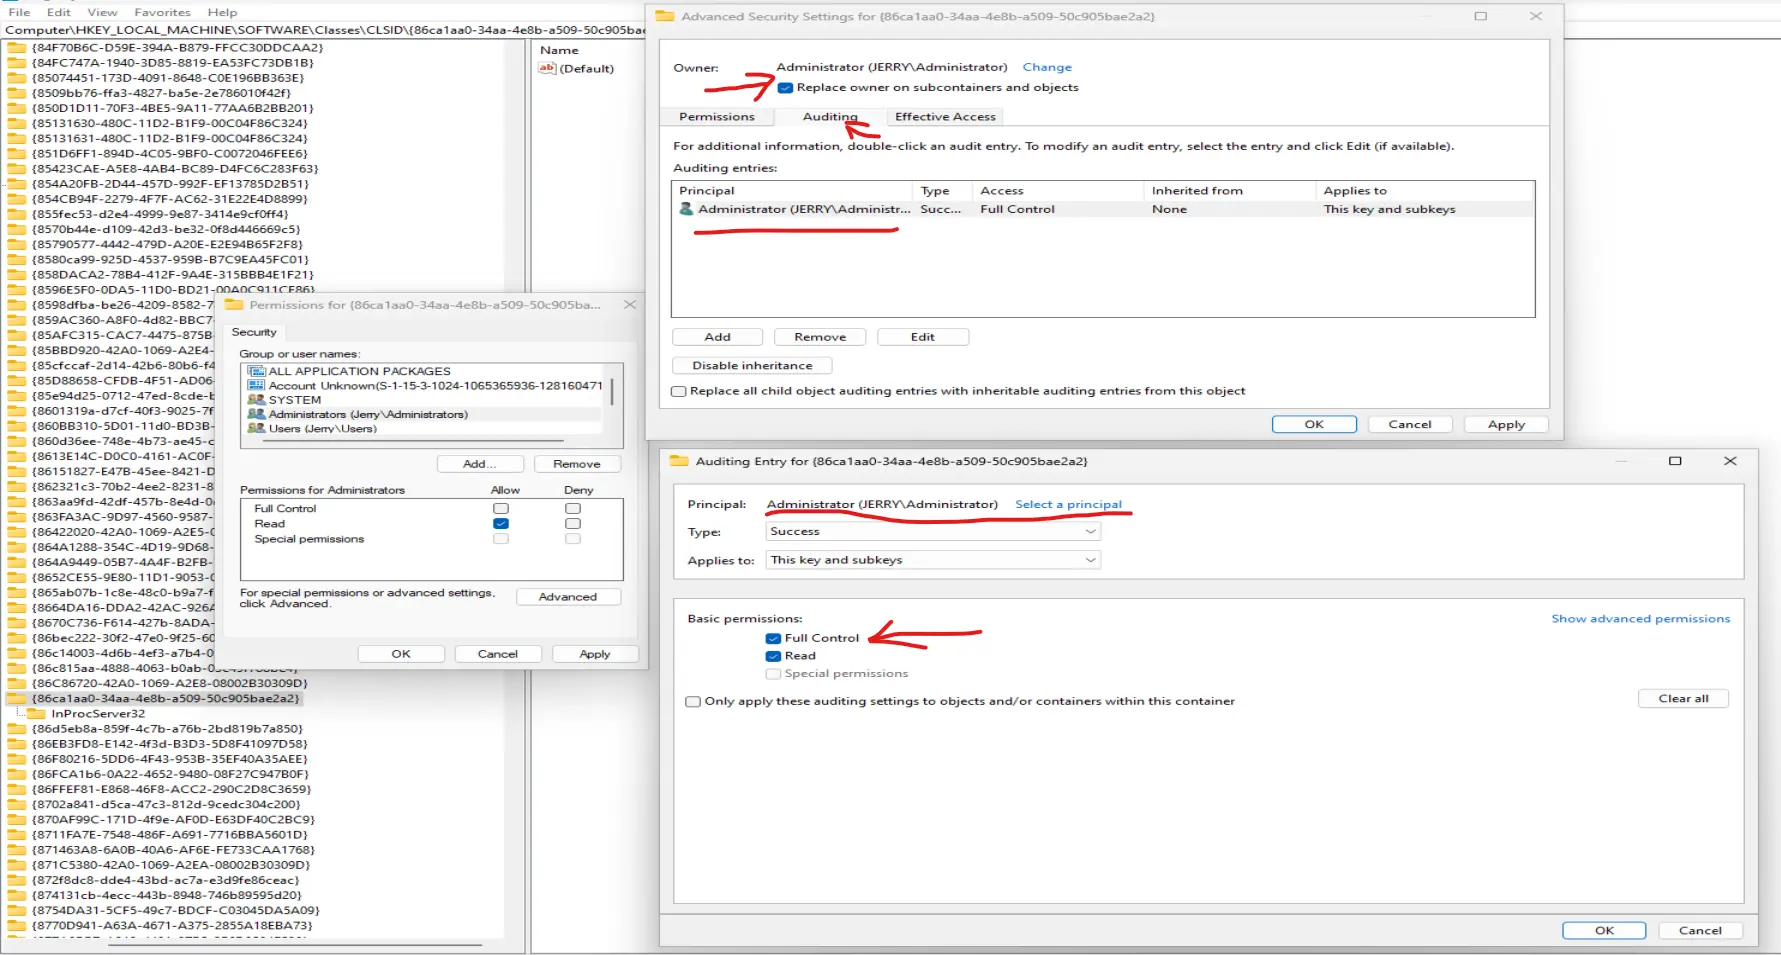
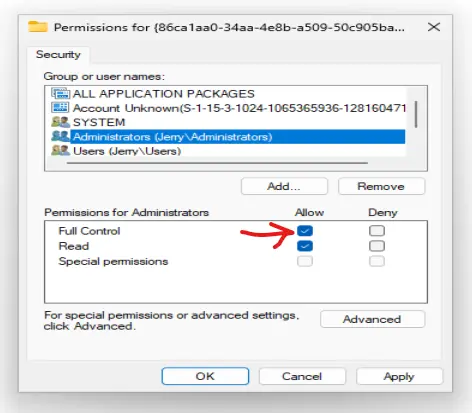
- In the Permissions dialog window for the {86ca1aa0-` registry key, select the Administrators group and check the Full Control checkbox.
4. Delete the Specific Registry Items.
- Return to the `InProcServer32` entry, copy and back up the contents of the two sub-items on the right side.
- Default: C:\Windows\System32\Windows.UI.FileExplorer.dll.
- ThreadingModel: Apartment.
- Delete the value to empty of these two sub-items.
- If deletion fails, ensure permissions are correctly set and try again.
5. Restart the Computer.
- After completing the steps, restart your computer.
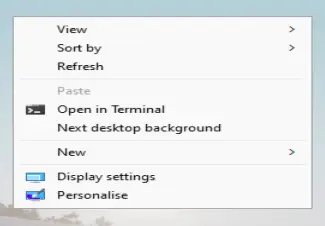
- After rebooting, when you right-click on the desktop or a folder, the original Windows 10-style menu will appear directly without needing to click “Show more options“.
6. Restore to Windows 11 Default Settings.
- If you wish to revert to the default Windows 11 right-click menu.
- Open the Registry Editor and navigate to the same path.
- Copy the previously backed-up sub-item content back into the `InProcServer32` entry.
- Default: C:\Windows\System32\Windows.UI.FileExplorer.dll.
- ThreadingModel: Apartment.
- There’s no need to restart your computer; the right-click menu will immediately revert to the Windows 11 default style.