In the article How To Install ShadowSocks On Google Cloud Linux, we have learned how to set up and configure ShadowSocks server on google cloud Linux, but how about AWS, this article will tell you how to run ShadowSocks on an AWS virtual machine.
1. Launch Amazon EC2 Linux Instance.
- Login to https://aws.amazon.com with your Amazon AWS account.
- Go to amazon AWS management console. Click the EC2 link to go to Amazon EC2 dashboard.
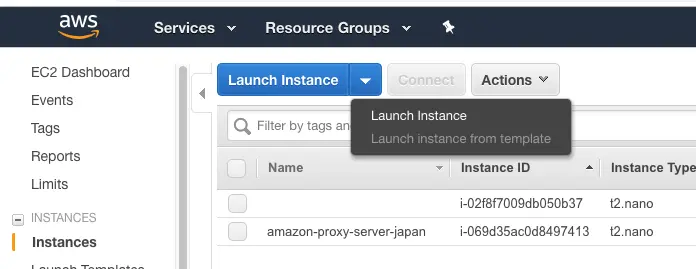
- Click the Instances link in the left panel. Then click the Launch Instance button menu in the right panel to create a new instance.

- Select a Ubuntu OS in the next wizard.

- Choose one EC2 instance type such as t2.nano is enough for this example. And then click Review and Launch button to launch the instance.
- Please save the generated private key file ( .pem file ) carefully, this is useful when you use an ssh client to connect to the Ubuntu Linux server later.
2. How To Regenerate Amazon EC2 Instance Private Key File.
Sometimes you may lose the EC2 instance private key file ( .pem file ), but you can not regenerate the private key file again to assign it to the original EC2 instance. In this case, you should follow the below steps to resolve this issue.
- Stop the original EC2 instance.
- Create one snapshot of the original instance.
- Use the snapshot to duplicate a new server and then you can create a new private key file during the process.
3. Use SSH Client To Connect To The EC2 Ubuntu Linux Instance.
Now the Ubuntu server has been created and started, we should use an SSH client to connect to it.
- In the EC2 instances list page, right-click the new instance, then click Connect menu item in the popup menu list to open the connect dialog.

- You have two methods to connect to the Ubuntu instance, use ssh client or java ssh.
- We will tell you how to use an ssh client to connect to the EC2 Linux server.
- Open a terminal and run the below command in it. If you use windows, you can use Putty to connect to the Linux server, please refer to Connect to your Linux instance from Windows using PuTTY.
$ ssh -i "ec2 instance private key file (.pem file) save path " ubuntu@PUBLIC DNS(PIv4)
- Below is ssh connect string example.
$ ssh -i "/Users/.../amazon-proxy-server-japan.pem" [email protected]
- But you may encounter errors like below during the connect process.
@@@@@@@@@@@@@@@@@@@@@@@@@@@@@@@@@@@@@@@@@@@@@@@@@@@@@@@@@@@
@
WARNING: UNPROTECTED PRIVATE KEY FILE!
@
@@@@@@@@@@@@@@@@@@@@@@@@@@@@@@@@@@@@@@@@@@@@@@@@@@@@@@@@@@@
Permissions 0644 for '/home/.../privatekey/abc.pem' are too open
It is recommended that your private key files are NOT accessible by others.
This private key will be ignored.
bad permissions: ignore key: /home/xxx/Documents/CloudFloorWestPem/cloudfloor-west.pem
Permission denied (publickey).
- This is because the private key file (.pem)’s permission is not correct, you should remove other group/users permission from the .pem file, so run below command to change the .pem file permission.
$chmod og -r /home/.../privatekey/abc.pem
- Now run the ssh command again, you can log in to the Amazon EC2 Ubuntu Linux server successfully.
4. Install ShadowSocks Server And Start It In Amazon EC2 Ubuntu Linux Successfully.
- Install ShadowSocks server follow article How To Setup ShadowSocks VPN On Mac, Windows And Linux Linux section.
- When you start the ShadowSocks server with below command.
$ ssserver -c /etc/shadowsocks/config.json start
- You may encounter an error message socket.error: [Errno 99] Cannot assign requested address.
root@:~# ssserver -c /etc/shadowsocks/config.json start INFO: loading config from /etc/shadowsocks/config.json 2018-11-30 11:45:00 INFO loading libcrypto from libcrypto.so.1.1 2018-11-30 11:45:00 INFO starting server at 54.199.236.197:9090 Traceback (most recent call last): File "/usr/bin/ssserver", line 11, in <module> load_entry_point('shadowsocks==2.9.0', 'console_scripts', 'ssserver')() File "/usr/lib/python2.7/dist-packages/shadowsocks/server.py", line 74, in main tcp_servers.append(tcprelay.TCPRelay(a_config, dns_resolver, False)) File "/usr/lib/python2.7/dist-packages/shadowsocks/tcprelay.py", line 733, in __init__ server_socket.bind(sa) File "/usr/lib/python2.7/socket.py", line 228, in meth return getattr(self._sock,name)(*args) socket.error: [Errno 99] Cannot assign requested address - This is because your ShadowSocks server ip configuration value is not correct.
- Open /etc/shadowsocks/confg.json file with vim.
$ vim /etc/shadowsocks/confg.json
- Update the server ip address value to 0.0.0.0 in the config.json file, then the ShadowSocks server can be started successfully.
5. Edit EC2 Linux Instance Used Security Group.
Now you have installed the ShadowSocks server in the AWS Ubuntu Linux instance successfully. Next, you need to configure a security rule for the EC2 instance to enable clients to access the ShadowSocks server.
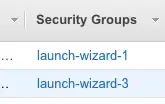
- Click your EC2 instance’s security group link at the end of the instance list page instance row. In this example the ShadowSocks server instance’s security group link name is launch-wizard-3.

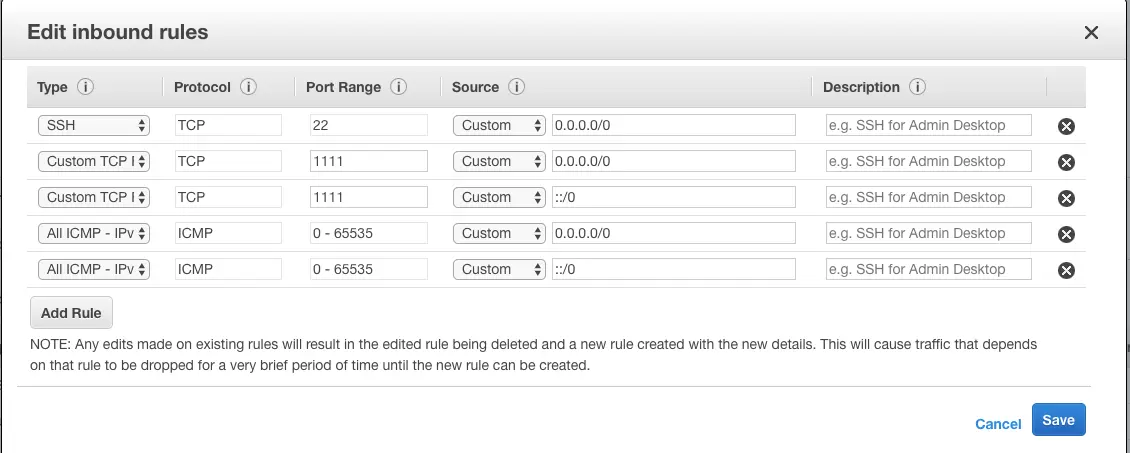
- Click the Inbound tab on the open page, then click the Edit button. Click Add Rule button to add new rules. Select Custom TCP in the Type list, select TCP protocol, and input the ShadowSocks server listening port number in the Port Range input box. Select Anywhere in the Source dropdown list, this allows you to use the ShadowSocks server from any IP address. Click the Save button to save the changes.

- Now you can use a ShadowSocks client tool to connect to the ShadowSocks server, if you want to test the connection, you can use an android phone with the ShadowSocks android client tool to test the connection. You can refer article How To Setup ShadowSocks VPN On Mac, Windows And Linux android section. The ICMP rule in above picture can let you ping the EC2 server successfully.